sonarr + radarr
i have since moved my entire flexget setup which was on my seedbox to sonarr (tv) and radarr (movies) and never looked back. something you will need to take note when installing sonarr and radarr is that the setup needs to be able to installed on a platform where you have direct access to your tv-shows and movies, which can either be local or mapped drives through smb or afp.
you can choose to have sonarr and radarr installed on your macOS since drives are persistently mapped onto your macOS server. visit the following links for more info:
- sonarr macOS installation guide.
- radarr macOS installation guide.
if you need to have docker bash accessed, you can do so in two ways. first being accessing the gui under synology and accessing it through their terminal page but a preferred method of mine is via ssh. once you have ssh into your synology box execute these commands. in this example, i am using influxdb as a sample:
docker exec -it influxdb bashthat will then allow you to execute commands within the container’s bash.
jump straight to…
- installing sonarr
- sonarr gui setup
- installing radarr
- installing jackett proxy
- installing ombi request system
- plexoauth in ombi
- ombi unable to launch fix
- ssl errors for Synology sonarr fix
- bazarr installation
ssh commands required
majority of the ssh commands requires nano or vim. my choice of a terminal editor would be nano. to find out more how to use nano, visit the following page to get the basics.
look out for notes
notes are placed in the guides, these markers requires your attention.
- 🗣 note: comments which you should take note of.
- ⚠️ important: comments which are important.
report inaccuracies and errors
if something in this guide is inaccurate, wrong, or outdated, report it by scanning the qr code.
👨🏻💻 [installing sonarr]
launch docker from your synology box.
under registry, search for sonarr.
install the linuxserver.io edition
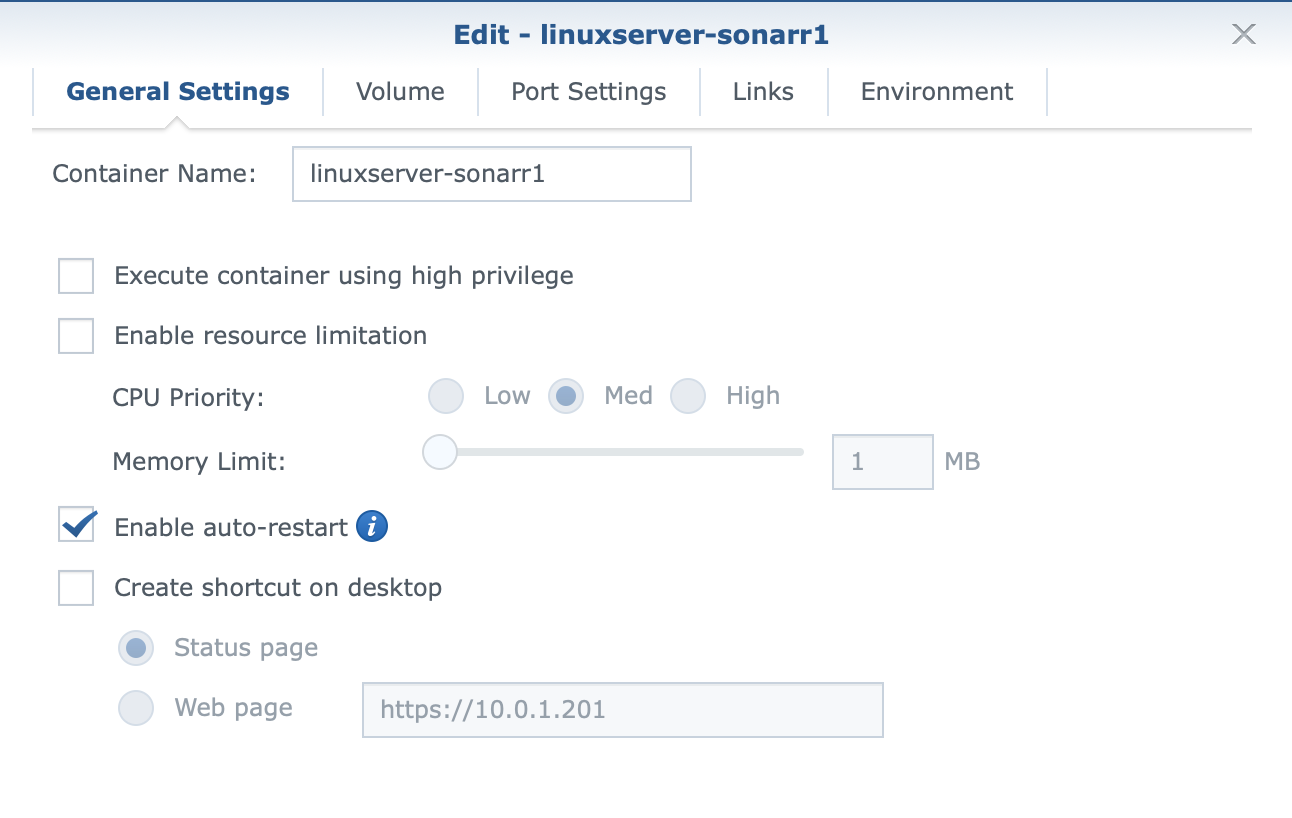
after it has finished installing, click on the container to launch it and proceed to advanced settings
ensure that auto restart is enabled.
proceed to the volume tab and map the following:
- downloads folder - this is where your syncthing is downloaded into
- tv shows folder - the folder of where you store your tv-shows in.

- 🗣 note: you will need to create a config folder. in your synology create the folder. /volume1/docker/sonarr map it as /volume1/docker/sonarr to /config.
- set your port settings, the default port setting for sonarr is 8989, however, i have it set to another port, 32800
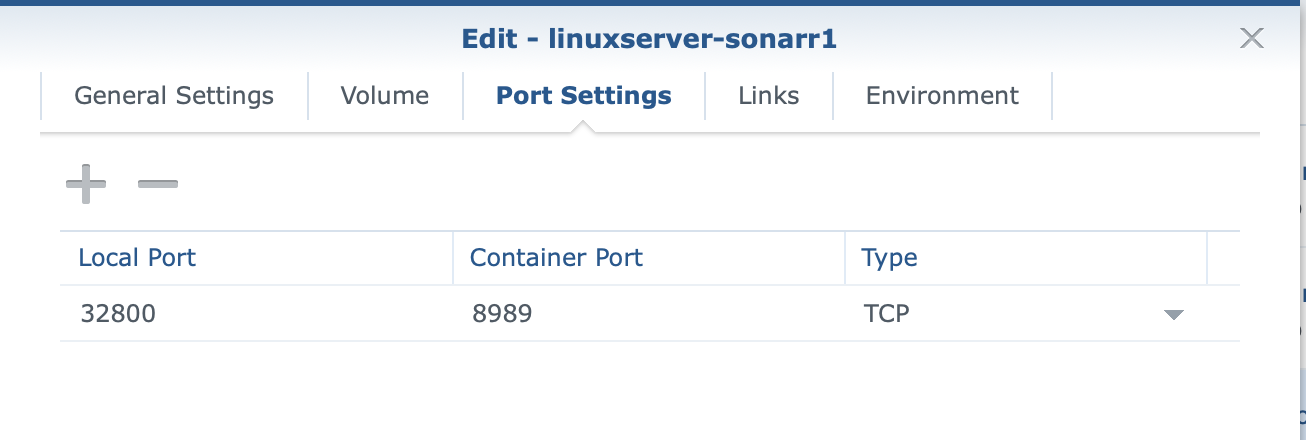
- 🗣 note: you will be accessing sonarr’s gui page at http://yoursynologyip:32800
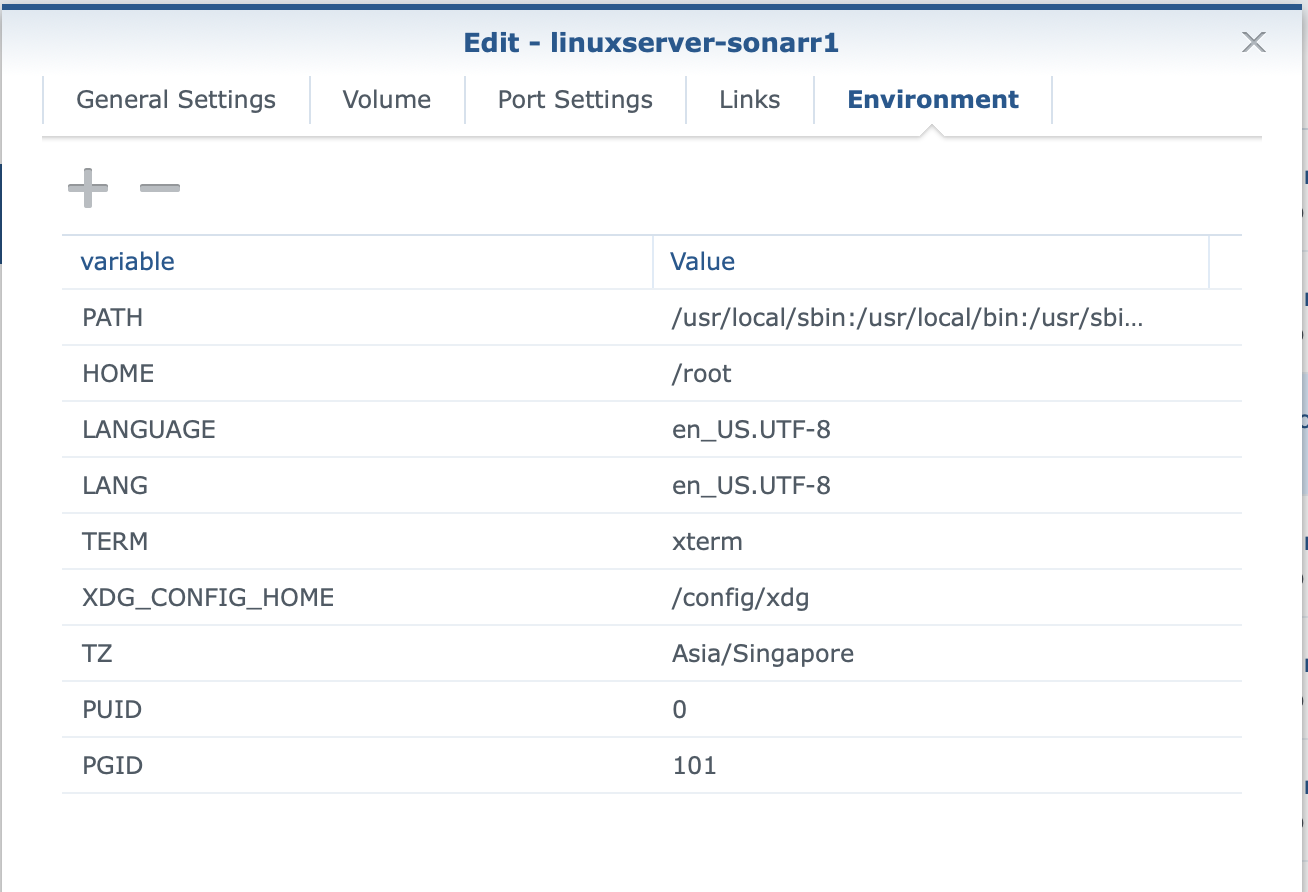
- under envrionment, have the settings as such:
- path: /usr/local/sbin:/usr/local/bin:/usr/sbin:/usr/bin:/sbin:/bin
- home: /root
- language: en_US.UTF-8
- lang: en_US.UTF-8
- term: xterm
- xdg_config_home: /config/xdg
- tz: asia/singapore (change this to your own country)
- puid: 0
- pgid: 101
save it and run the container.
access the site at http://yoursynologyip:portnumber
👨🏻💻 [setting up sonarr gui]
after you have successfully have the docker container setup, it is now time to have your sonarr gui setup. please note that i am using a seedbox to manage my downloads.
access your sonarr gui
click on settings > profiles to setup your quality of downloads, it is quite self-explantory
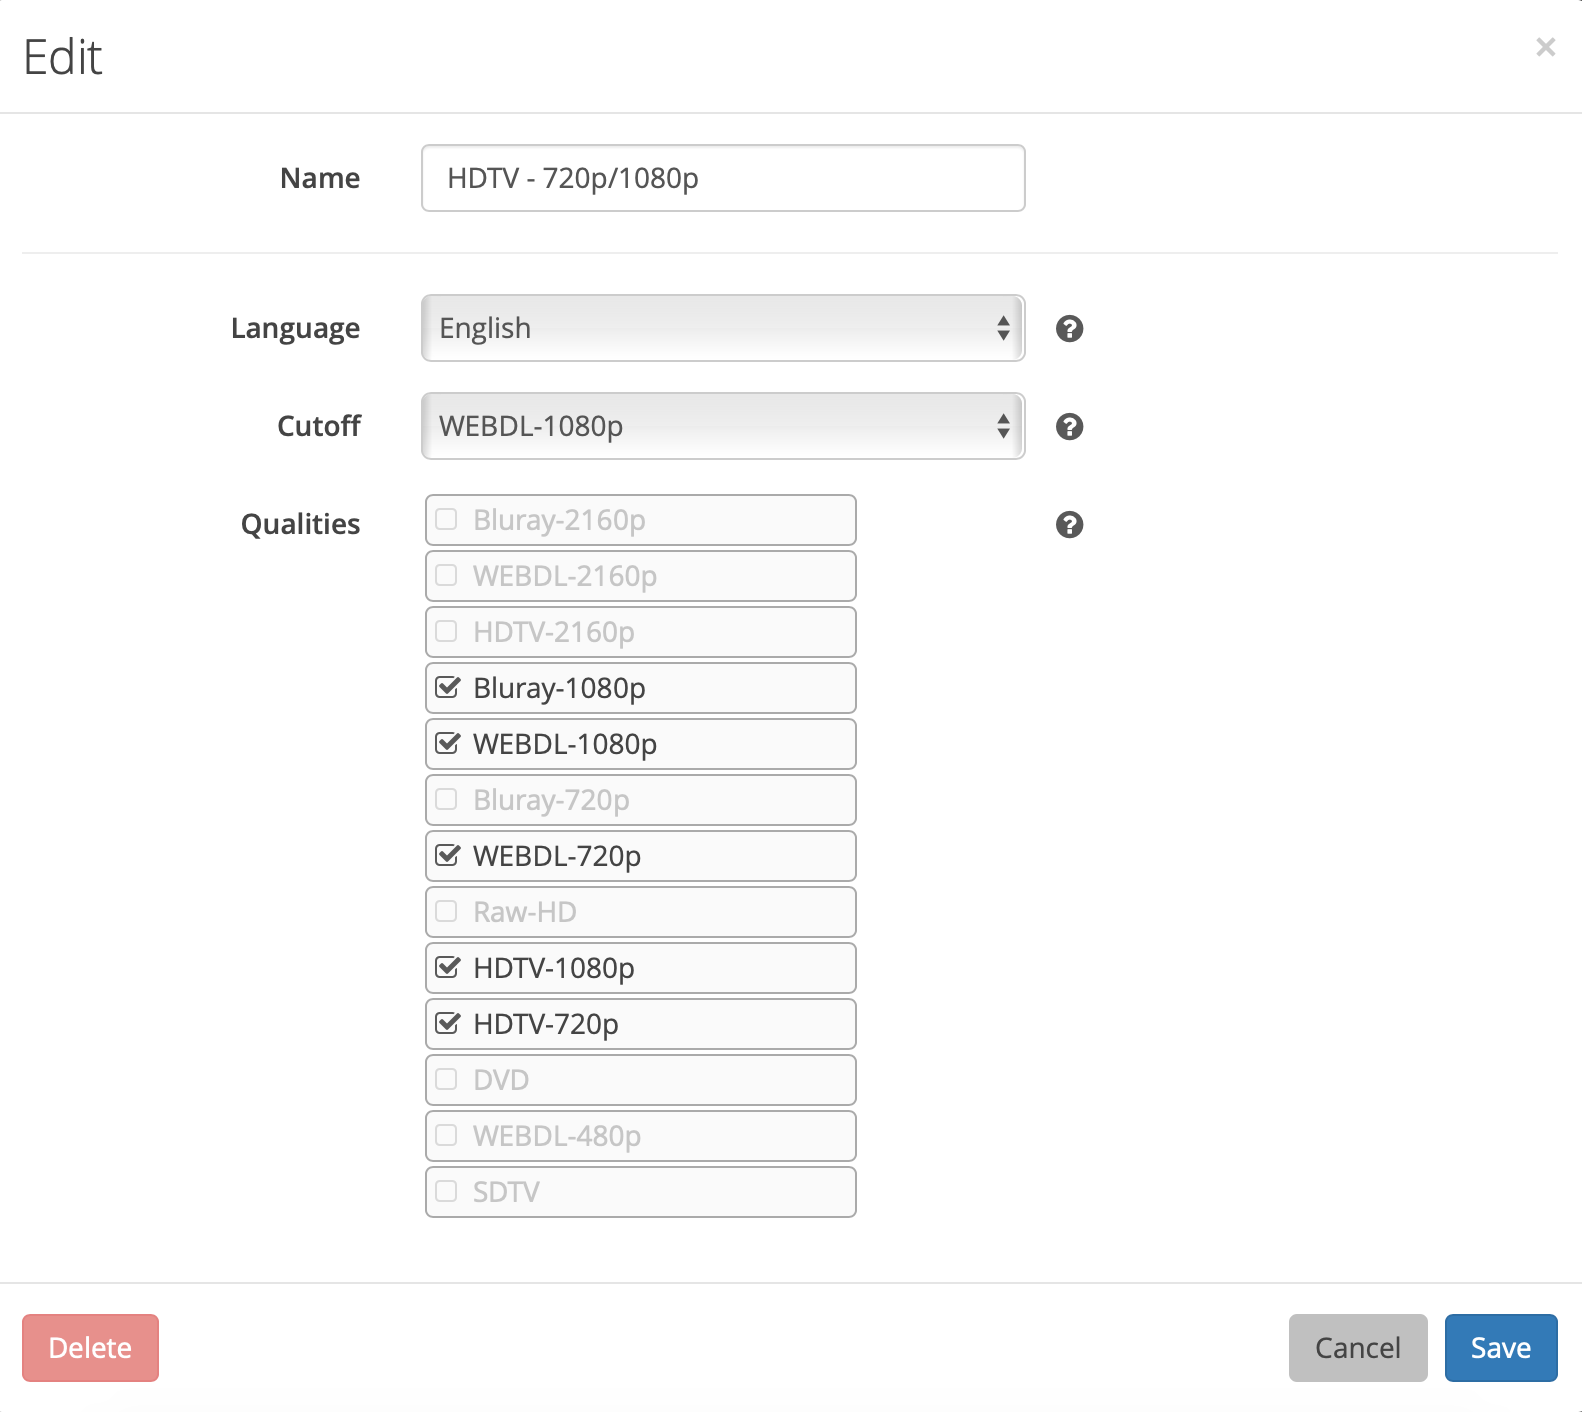
- 🗣 note: the light-blue is the cut-off that i have set for tv-shows, if a download quality is web-dl-1080p sonarr will not persue to locate a better quality.
- next is the quality. this refers to the size cut-off for minimum and maximum download size.
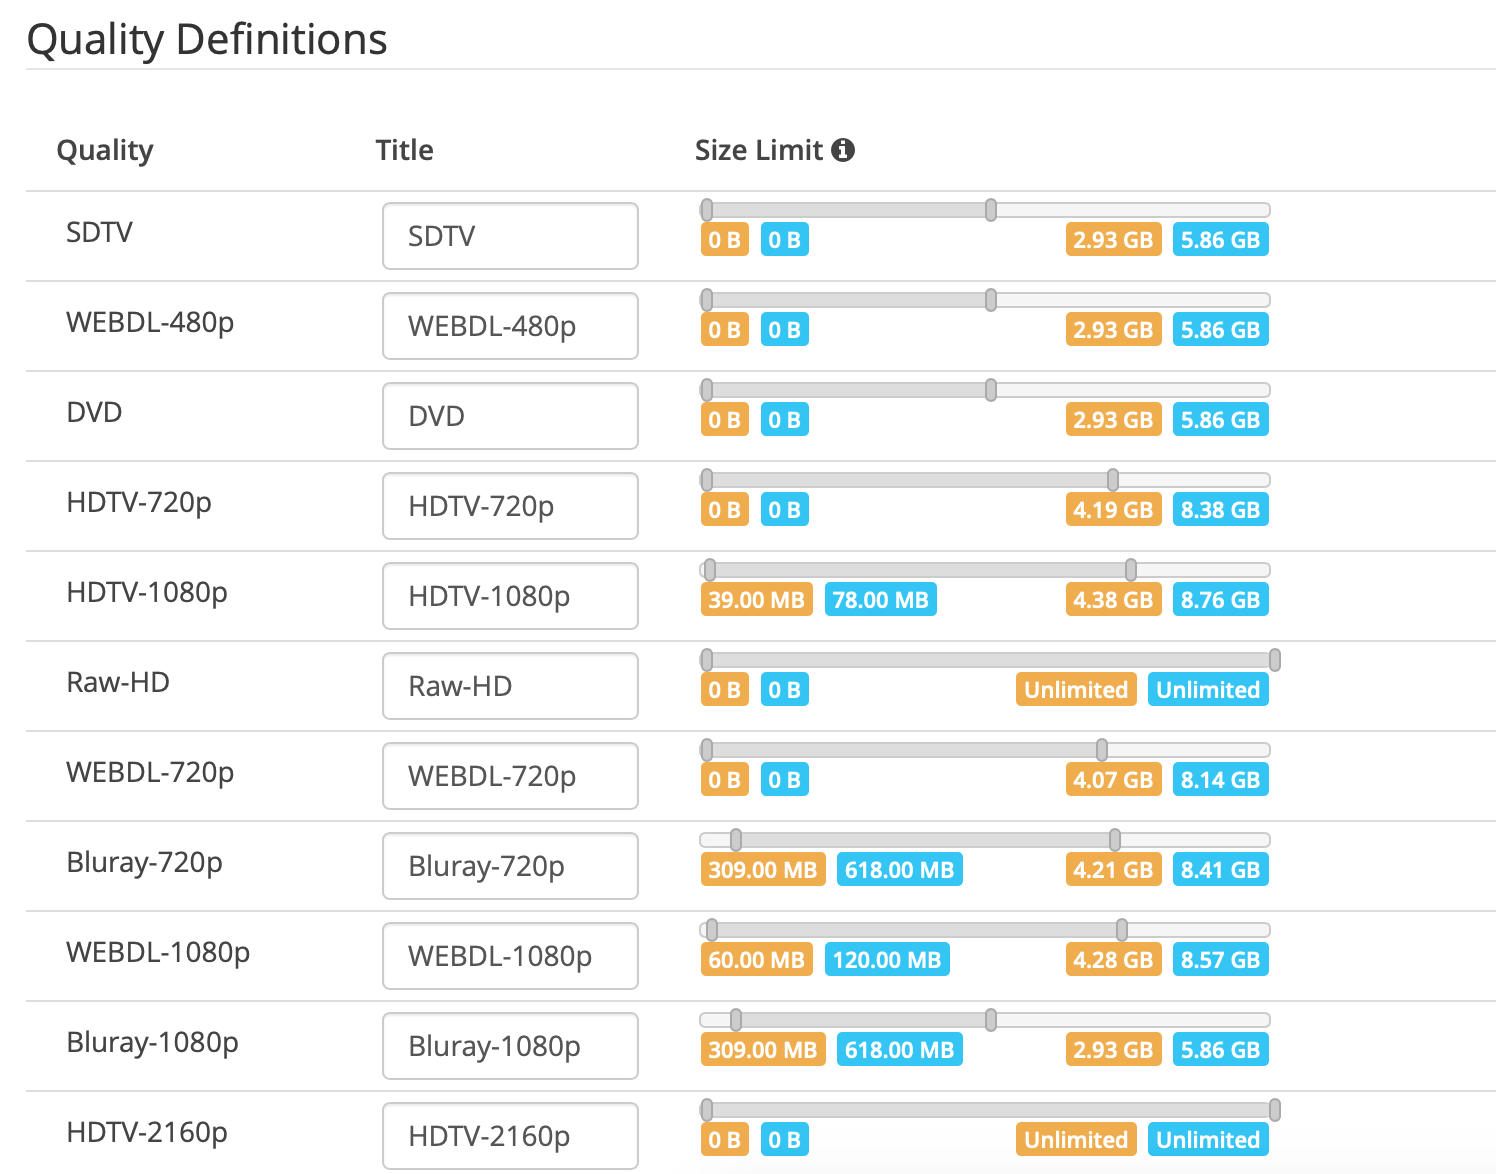
- 🗣 note: similar to flexget’s min/max file size.
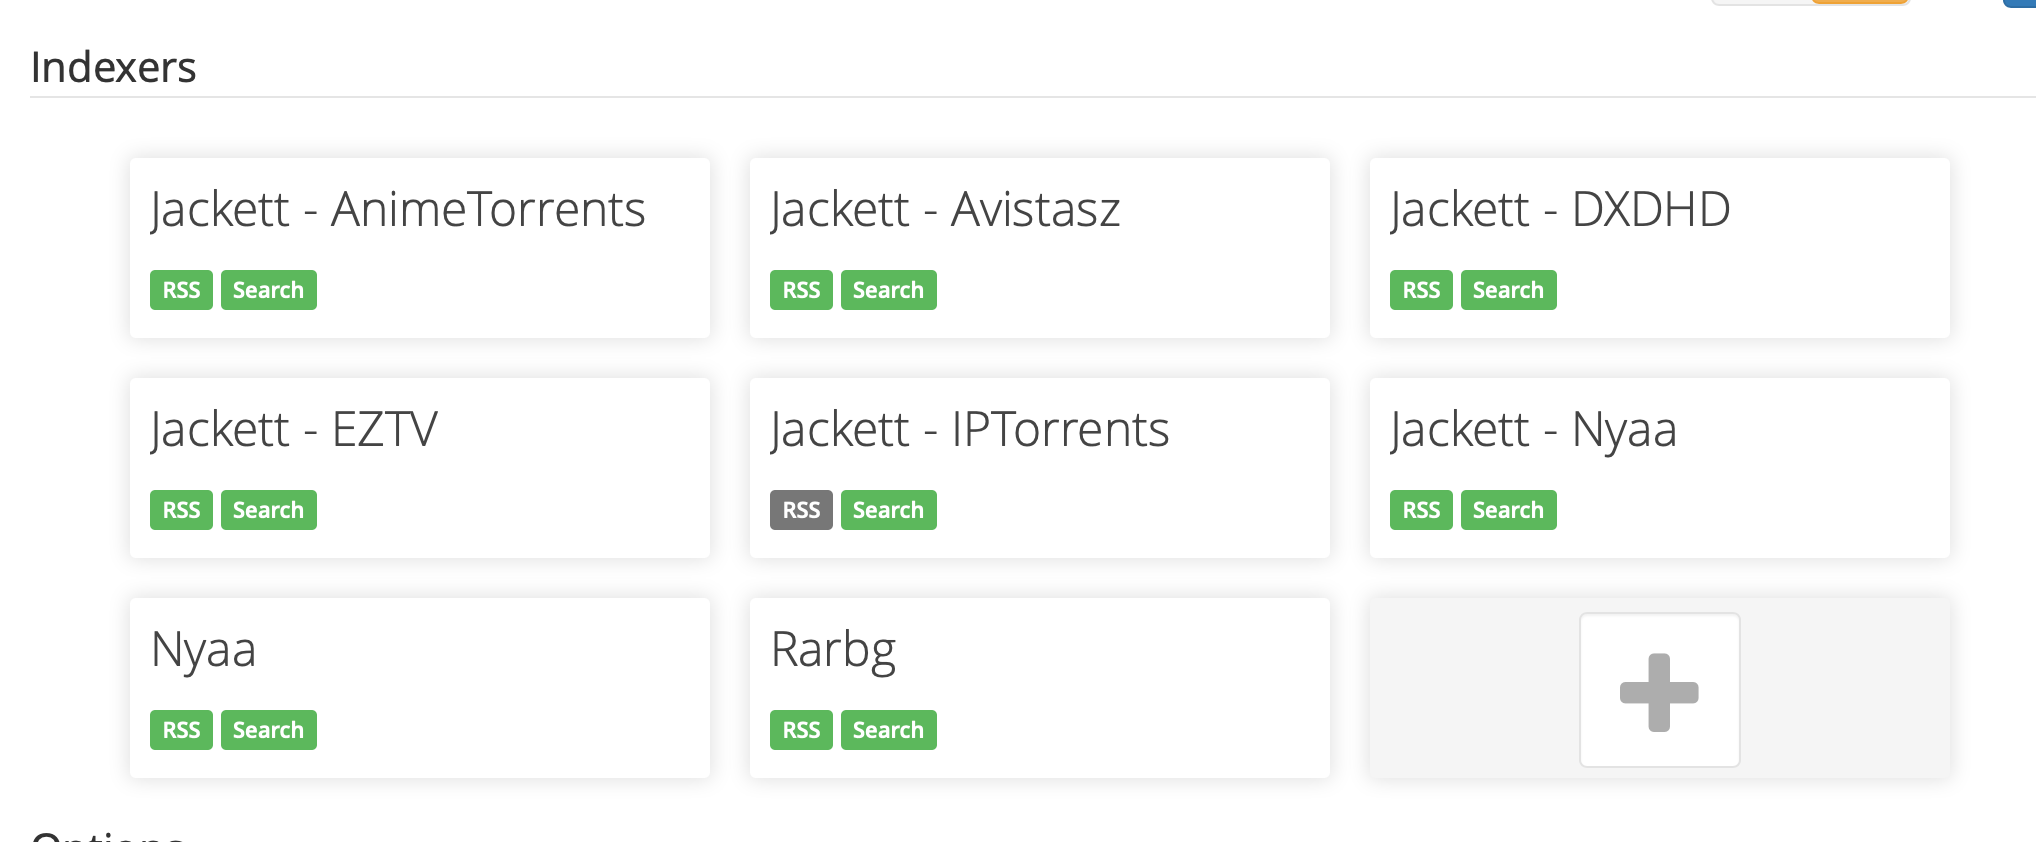
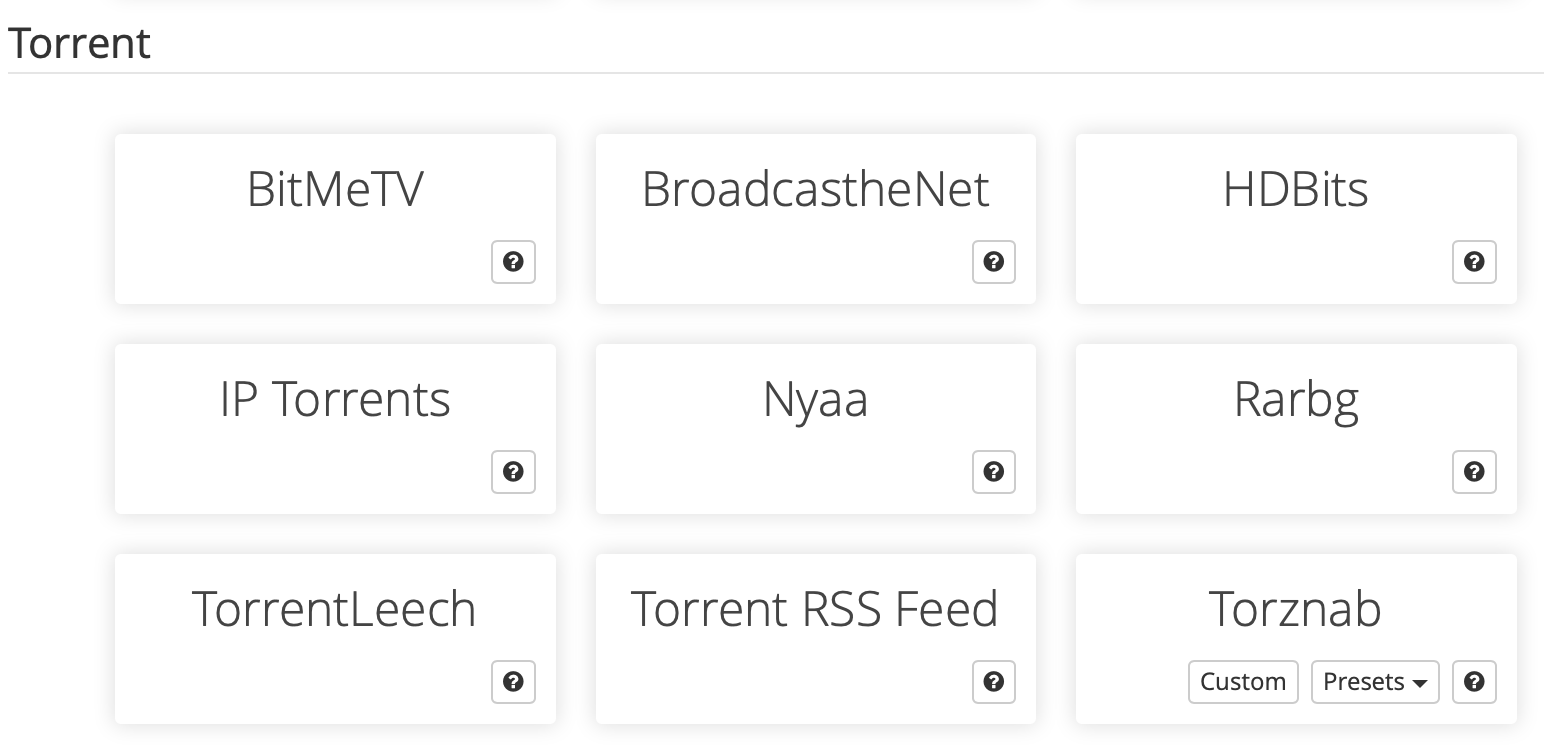
- next are the indexers. indexers are where your sources are from. (refer to jackett section later too). here you can add rarbg, etc.
next is your download client.
- ⚠️ important: this part is particularly important since the seedbox is used. this will enable the downloads from the seedbox to be identified and then allow sonarr to automatically move the downloads from your download path into the correct tv-show season folders.
setup your download client by clicking on the + sign. (e.g. transmission, deluge)
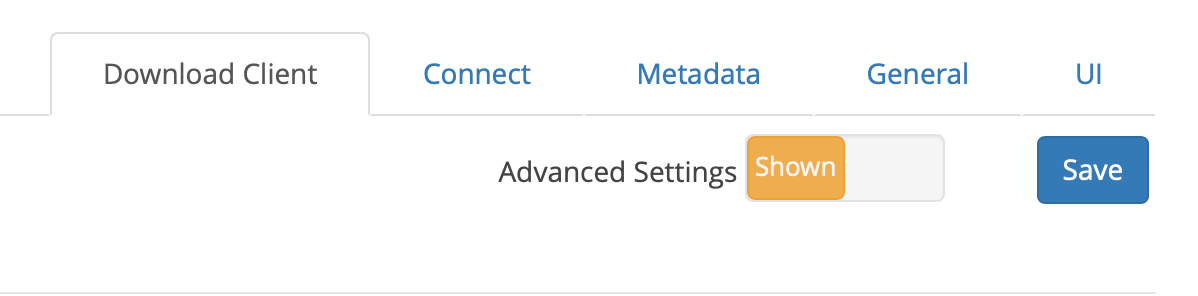
after you have added and tested the connection to your download client, ensure you toggle to show advanced settings
- scroll down and locate remote path mappings and add the remote mappings from your sonarr to your seedbox (see example below)

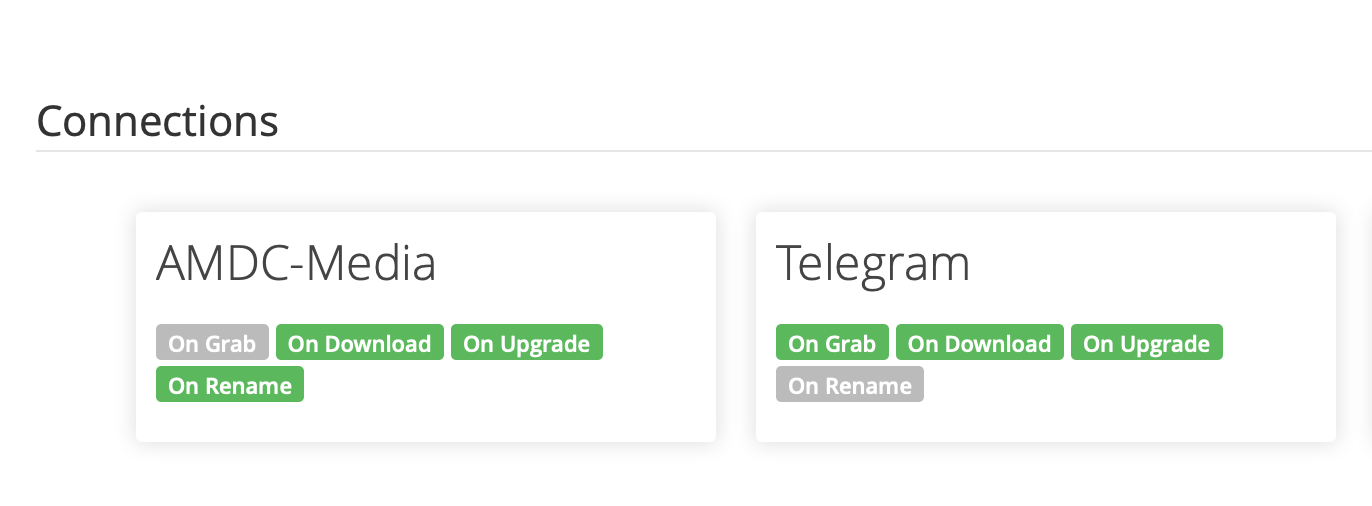
next are the connections.
- ⚠️ important: this is where you can setup your notifications. you will also need to have plex connected, this will allow automatic metadata refresh and addition of shows into your library.
- the rest of the settings are what you wish to set like general, ui. for information, i left these largely untouched.
👨🏻💻 [installing radarr]
- 🗣 note: radarr’s installation is similar to sonarr’s, which is listed above. just follow the steps as shown above.
👨🏻💻 [setting up radarr gui]
- 🗣 note: radarr’s gui is also similar to sonarr, which one exception. please see below.
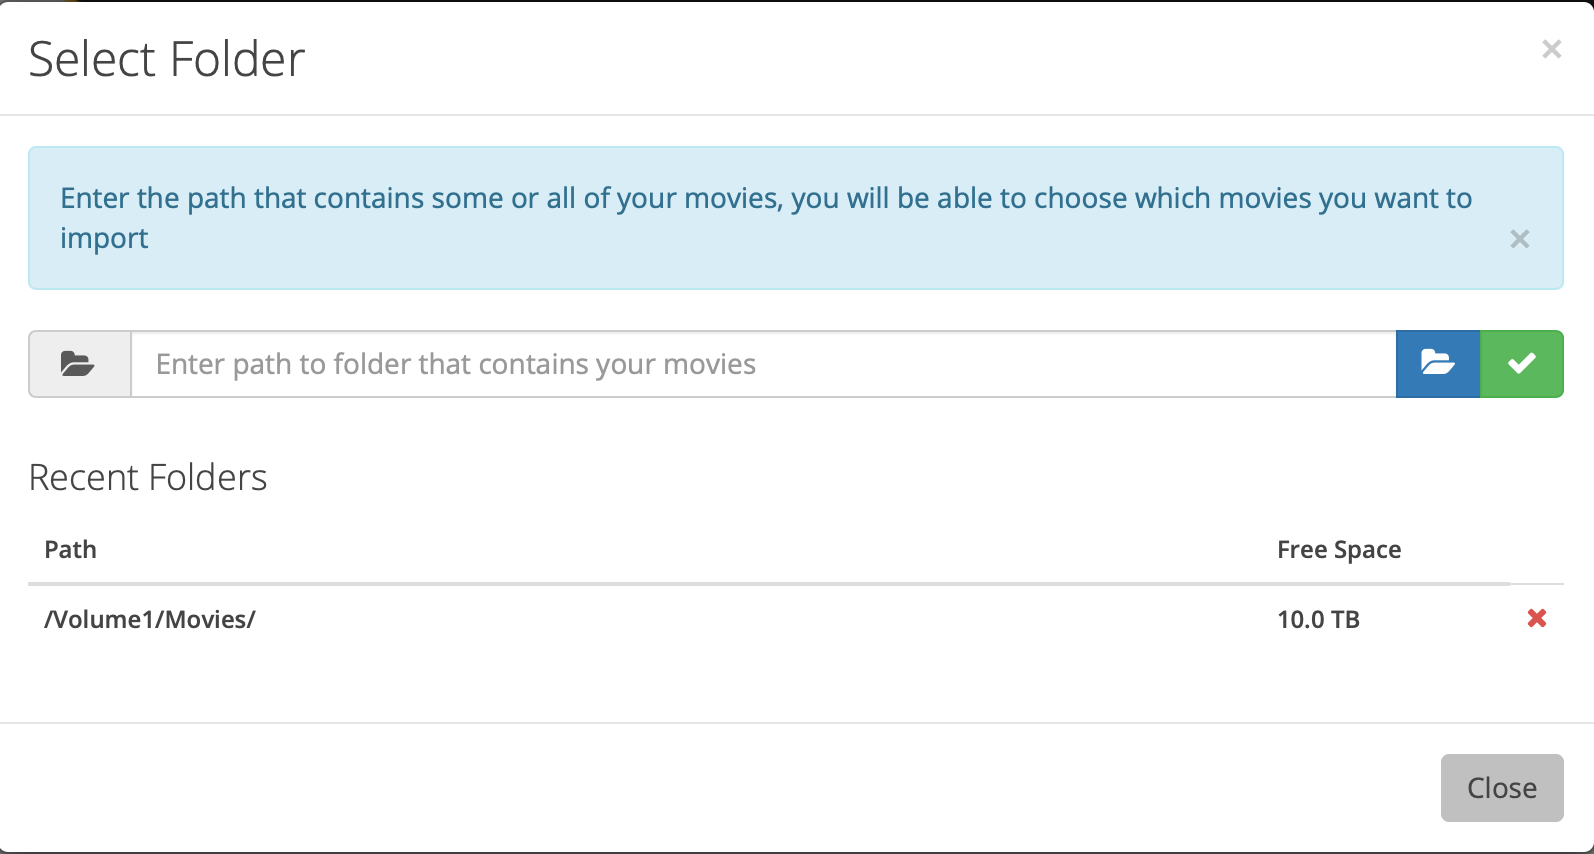
- after accessing your radarr gui, you will need to add your movie folders path. to do this, click on + movies bulk import movies and add the path of your movies folder.
- the rest of the settings are similar to sonarr.
👨🏻💻 [installing jackett]
jackett is required if you are using iptorrents or any other indexers which are not avilable on sonarr and radarr’s list of default indexers. you can have this installed on your synology as well, jackett is available in the synocommunity package directory.
access whatbox and then follow their wiki to have jackett installed onto your slot.
after installing, access your jackett gui.
the very first thing you should do is to copy down the api key from jackett into a note for later use.
click on +add indexer
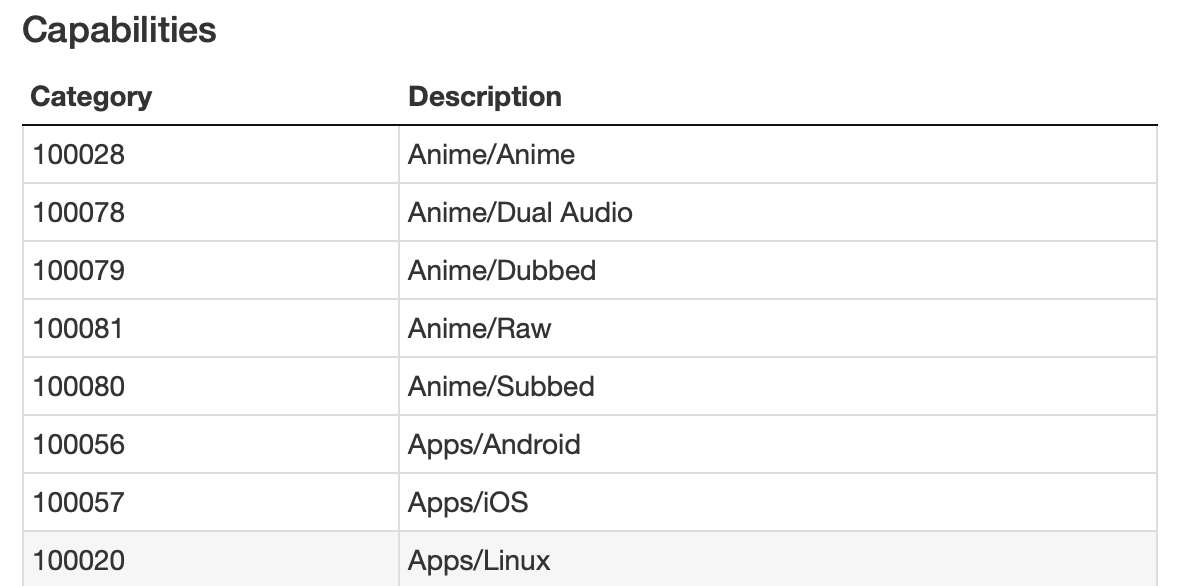
search for your indexer and ensure that you also click on the wrench icon and copy down the caterogies
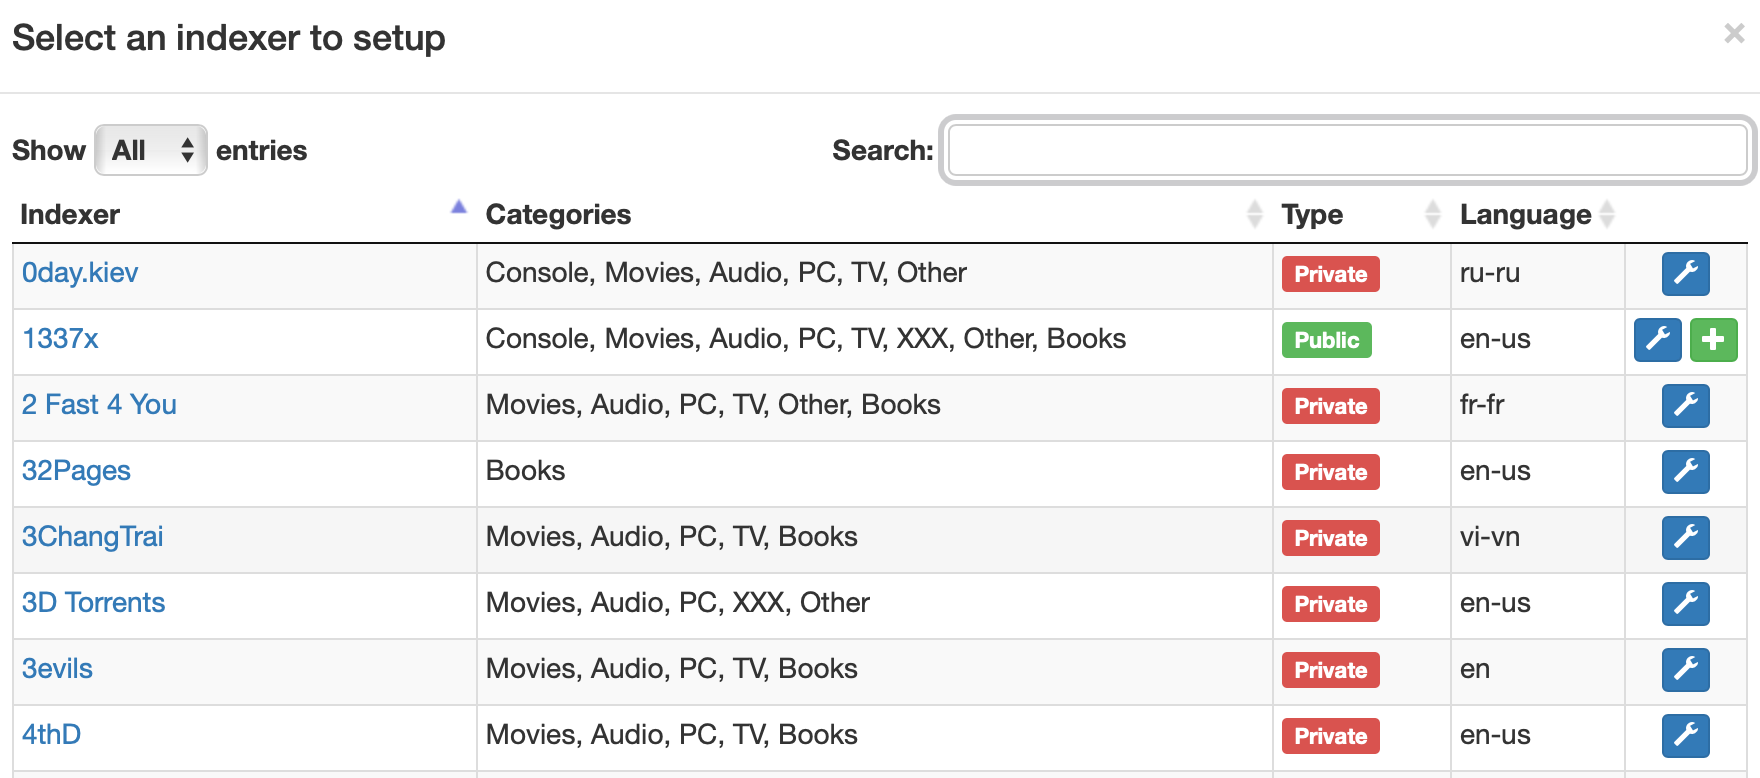
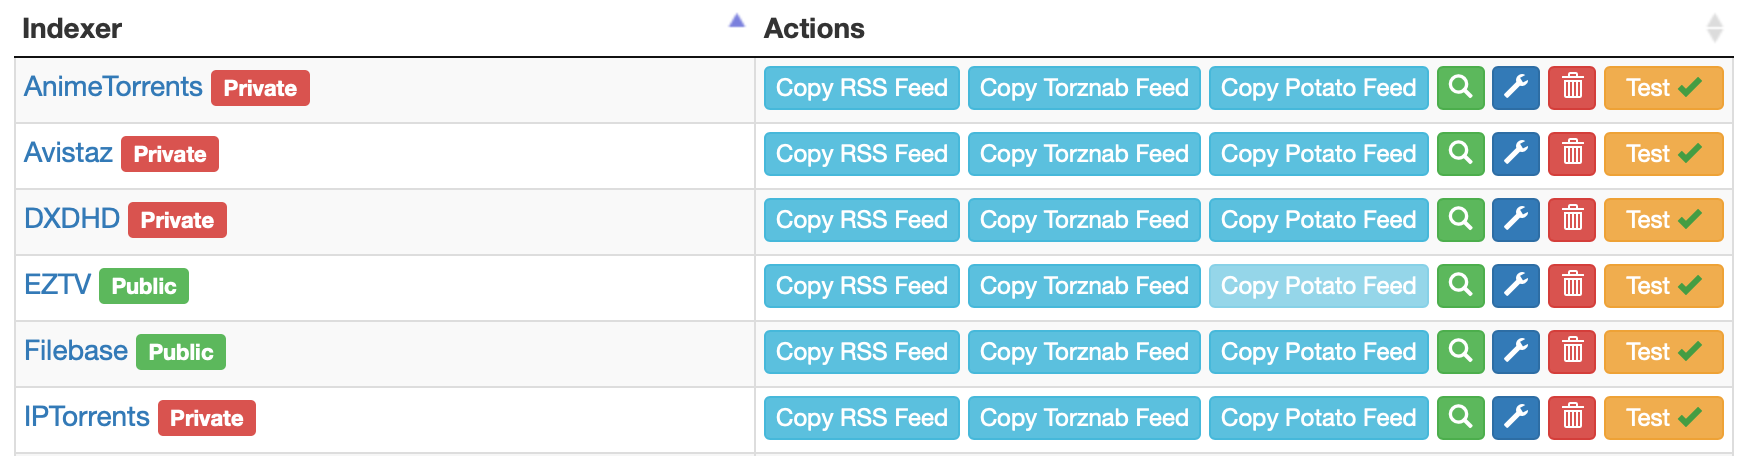
- after adding all your configured indexers. click on copy torznab feed
now head back to either your sonarr or radarr gui and proceed to settings > indexers.
click on the + sign to add a new indexer. locate torznab and click on custom
when adding the details, paste the url you had copied from step 6 from above.
enter all the rest of the details accordingly
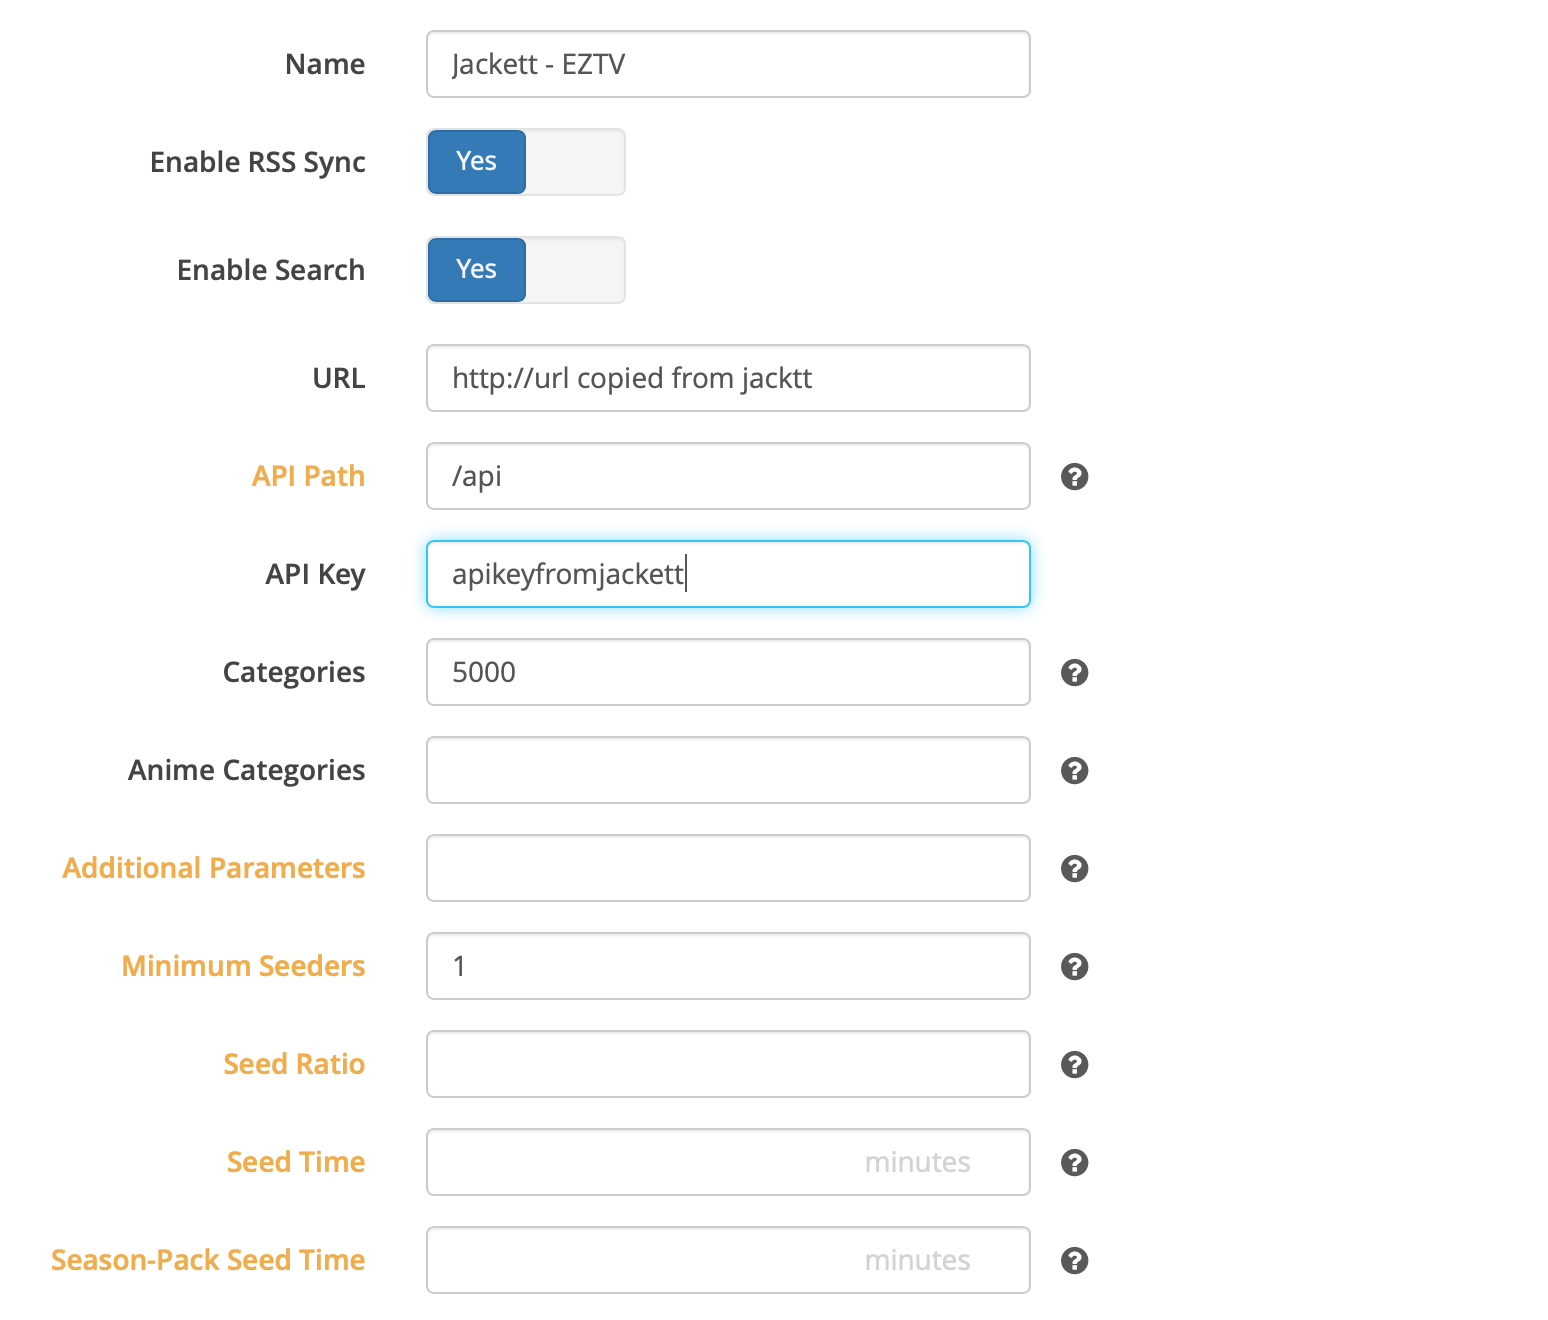
click on test before you save and exit.
repeat steps 5 to 9 to add more indexers in.
👨🏻💻 [ombi]
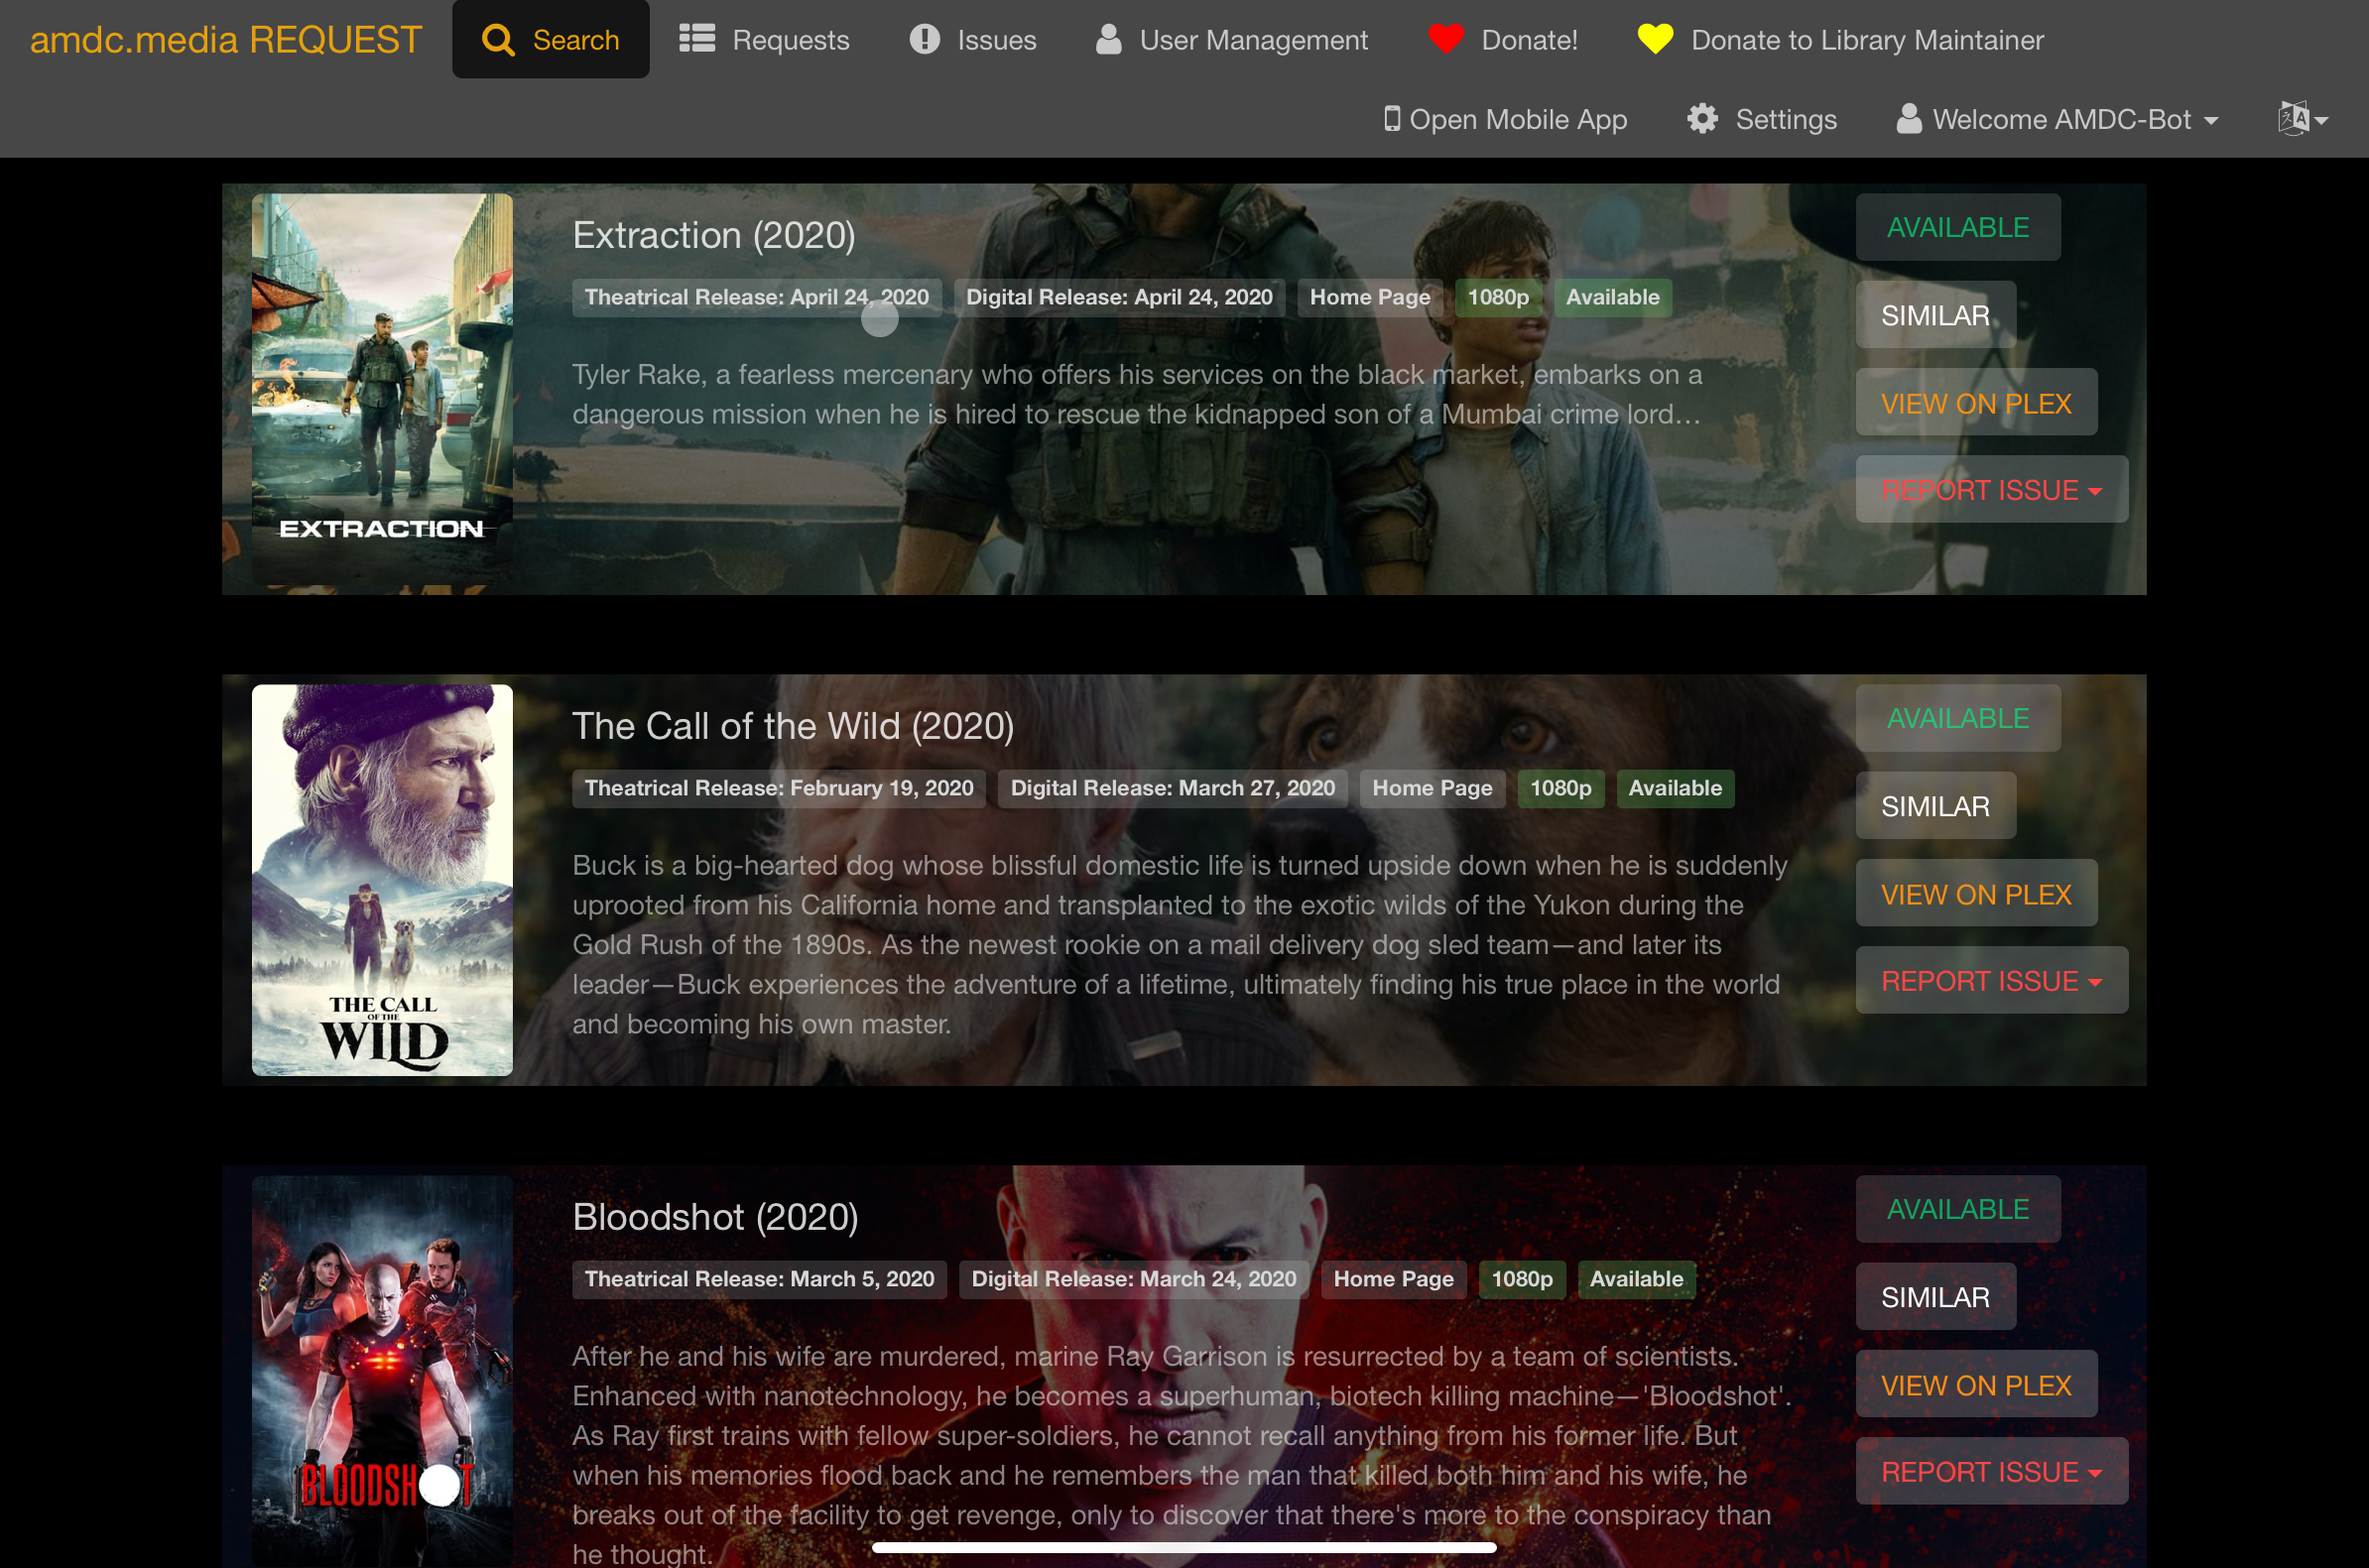
ombi is used as a request system for both sonarr and radarr. i have this extended out to users of amdc.media as well. you can think of this as having your own trakt.tv system, however, definitely not as refined.
what i like about ombi is that its fully integrated with both sonarr, radarr and plex and uses your plex authentication token to login and sync the setup. there are trakt equivalent plugins for sonarr, however, i’ve not tried these out before. if interested, you can try the following out.
you will need sonarr and/or radarr to use ombi, this doesn’t work with flexget.
look out for the following in the guides below:
- 🗣 note: just some comments of mine and something to take note of.
- ⚠️ important: this depicts something of importance, of course - proceed with some
visit the [ombi.io] (https://github.com/tidusjar/Ombi/wiki/Installation#macos) macOS installation guide page.
follow the instructions and take note of the catalina gatekeeper comment by the developer. else use the docker edition. (which i think should be seriously looked into considering we dabble in these installs).
the rest of the configuration will take place on your macOS.
on your macOS
after you have completed the install for your ombi and if you have a terminal.app which has ombi launched, do a ctrl + c to stop it first.
install the launchagent.plist for your ombi setup:
sudo nano ~/library/launchagents/com.placetheserver.ombi.plistcopy and paste the following but change out the items correct, such as the
of your working directory: <?xml version="1.0" encoding="UTF-8"?> <!DOCTYPE plist PUBLIC "-//Apple//DTD PLIST 1.0//EN" "http://www.apple.com/DTDs/PropertyList-1.0.dtd"> <plist version="1.0"> <dict> <key>Label</key> <string>com.PlaceTheServer.Ombi</string> <key>ProgramArguments</key> <array> <string>./Ombi</string> </array> <key>WorkingDirectory</key> <string>/Users/xxx/ombi</string> <key>KeepAlive</key> <true/> <key>RunAtLoad</key> <true/> </dict> </plist>
- 🗣 note: you can place ombi wherever you want, just make sure that the string for working directory correlates accordingly.
to launch it, enter the following in your terminal.app:
sudo launchctl load ~/library/launchagents/com.placetheserver.ombi.plistto have it unloaded, enter the following in your terminal app:
sudo launchctl unload ~/library/launchagents/com.placetheserver.ombi.plist
access your ombi page and set it up at http://yourmacos.ip:5000
login and have your setup done.
the configuration setup will be required to be done done:
connect your plex media server to ombi:
- 🗣 note: to register your media server to ombi.
setup user importer: (if required)
- 🗣 note: user importer will import the users from your media library, this will allow you to grant them access to request for shows/movies or not at all. you can allow based on who you want and who you want to disallow. when setting this up, you can choose to allow auto-approval or manual approval of requests.
add your tv-shows/movies directory into ombi for discovery:
- 🗣 note: this is to allow ombi to know if the shows/movies are already available in your media libraries.
connect your sonarr/radarr setup to ombi.
- 🗣 note: you will need the api keys from both sonarr/radarr to be inserted into ombi, so go copy those to your clipboard
notification setup.
- 🗣 note: i use telegram, just create a new group chat if you want. this is useful only if you allow others in your media to request for shows/movies, so that you are notified.
once your done, try to login and requests for tv-shows and movies. depending on how you have your approval system setup, auto approved ones are immediately searched through sonarr/radarr and then downloaded.
lastly, customise your landing page and if need be, port-forward your ombi to allow public access (needed if you allow your users to request for shows)
👨🏻💻 [allowing plex oauth only in ombi]
this disables the ombi user (local) login for your ombi setup and only allows plex oauth to take place.
login to your ombi page and navigate to settings > configurations > customisations > custom css.
enter the following in the custom css code:
.form-signin:first-of-type { display: none; }save and exit.
you will see that the ombi local user is no longer available the next time you login:

👨🏻💻 [ombi unable to launch]
if your ombi is unable to launch stating that the port is already in use, use the following to look for the pid instance and terminate the process, instead of restarting your macOS server.
launch terminal.app and enter the following:
lsof -i :5000 (or whichever port number you assigned ombi)look for the pid and then take note of the number and execute the following:
kill -9 instancenumbernow launch ombi again.
👨🏻💻 [issues with mono ssl with sonarr]
due to a bug introduced by SynoCommunity’s poorly maintained Mono package. Sonarr will fail to connect after updating Mono or after a fresh installation. This can be resolved by following the instructions on SynoCommunity Bug Report #5051.
Using Terminal (MacOS) connect to the NAS using ssh -l [admin username] [NAS address] or using Putty (Windows) connect to the network address of your NAS
Enter the required admin password and press enter
Enter the following command: sudo /var/packages/mono/target/bin/cert-sync /etc/ssl/certs/ca-certificates.crt and press enter
Enter the required admin password and press enter. When complete you should see the line Import process completed
Enter the following command: sudo chmod -R a+rX /usr/share/.mono and press enter
👨🏻💻 [bazarr installation]
bazarr is a complimentary tool for sonarr and radarr and can grab the correct subtitles for your shows. i have mine installed on my nas and in a docker package. there is a synocommunity package, however, for the life of me, i can’t get the permissioning to work and almost got permission errors when extracting subtitles.
login to your Synology box webgui
locate the docker shortcut
navigate to registry and search for bazarr and select hotio/bazarr package and install it.
… to be continued.